


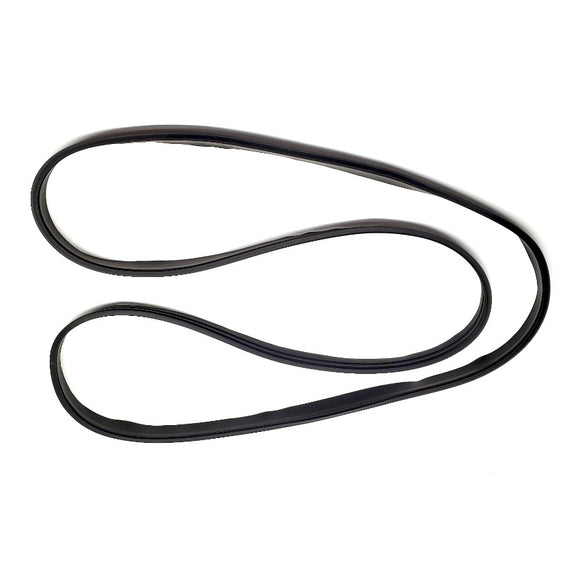


New Closed Cab Windshield to Cab Weatherstrip - CC797138
Continuous molded band goes on outside of windshield frame and fills the gap between the cab and windshield.
FITS THE FOLLOWING CLOSED CAB VEHICLES:
[1939-1947 2WD Truck] Dodge T, V & W Series (1939-47), Plymouth PT Series (1939-1941), Dodge Canada DB & DD Series (1939-1940), and Fargo FH Series Models (1939-1940)
[Vehicle Type A] Dodge WWII WC 1/2 Ton 4x4 (1941-1942)
[Vehicle Type B] Dodge WWII WC 3/4 Ton 4x4 (1942-1945)
[Vehicle Type D] Dodge, Fargo & De Soto Flat Fender Civilian Power Wagon (1946-1968) & Military Export (1957-1978)
A6E2/J2B1
Installation Instructions
This weatherstrip installs around the outside of the windshield frame and seals the gap between the windshield assembly and the cab.
Before You Begin
- The most important step is making sure the entire weatherstrip channel is completely clean before installation. Remove all traces of the old weatherstrip, hardened adhesive, dirt, rust, paint buildup, and other debris. Even a small amount of material left in the channel can prevent the new weatherstrip from seating properly and make installation much more difficult.
- We highly recommend using a Pick & Hook Set or Angular Scribers to thoroughly clean the entire channel, especially the corners and other difficult-to-reach areas. A useful set should include:
- Straight pick
- 45° pick
- 90° pick
- Full hook pick
- We also recommend using a general weatherstrip installation tool kit that includes a plastic tuck tool. A plastic tuck tool makes it easier to work the weatherstrip fully into the channel without cutting, tearing, scratching, or otherwise damaging the rubber.
- Install at normal room temperature, approximately 65–75°F. Avoid installing when the rubber is cold or excessively hot.
- We recommend using 3MWA23 - New 3M Windshield Adhesive.
- Have plenty of masking tape available to hold the weatherstrip in position while the adhesive cures.
- Do not stretch the weatherstrip. Stretching the rubber may cause it to shrink later, resulting in gaps or an improper fit.
Installation
- After cleaning the channel, inspect the entire windshield frame again to make sure no old rubber, adhesive, dirt, rust, paint buildup, or debris remains.
- Before applying adhesive, dry fit a section of the weatherstrip and verify that it is installed in the correct orientation. The profile will only fit properly one way.
- Begin at the top center of the windshield frame.
- Apply a small amount of 3MWA23 - New 3M Windshield Adhesive to only a few inches of the weatherstrip and windshield frame.
- Press the weatherstrip firmly into place.
- Use a plastic tuck tool as needed to work the weatherstrip fully into the channel without damaging the rubber.
- Immediately secure that section with masking tape.
- Continue working only a few inches at a time, alternating from one side of the windshield to the other.
- The upper corners are typically the most difficult part. Work slowly and use the plastic tuck tool to carefully seat the weatherstrip into the channel. Use additional masking tape to keep the weatherstrip seated while the adhesive cures.
- Continue working evenly down both sides until you reach the bottom of the frame.
- Once fully installed, trim the excess material and splice the two ends together at the bottom center using 3MWA23 - New 3M Windshield Adhesive.
- Leave the masking tape in place until the adhesive has fully cured before handling or reinstalling the windshield.
Helpful Tips
- Work slowly and install only a few inches at a time.
- If the weatherstrip does not want to seat fully into the channel, stop and inspect the area again. Old adhesive, rubber, rust, paint, or other debris left in the channel is one of the most common causes of installation difficulty.
- Use the different shapes in the Pick & Hook Set or Angular Scribers to reach the bottom, sides, and corners of the channel. One pick may work better than another depending on the area being cleaned.
- Use only a plastic tuck tool when pushing or working the weatherstrip into place. Metal screwdrivers, picks, or other sharp tools may cut, tear, or permanently damage the rubber.
- Avoid pulling or stretching the weatherstrip while positioning it.
- If the weatherstrip appears too long, do not stretch it to fit. Complete the installation first, then trim the excess at the bottom and splice the ends together.
- Positioning the splice at the bottom center helps keep it out of sight and minimizes the chance of water intrusion.
Shipping is calculated after your order is received.
Most orders require no payment at initial checkout.
Store & Shopping FAQs →